
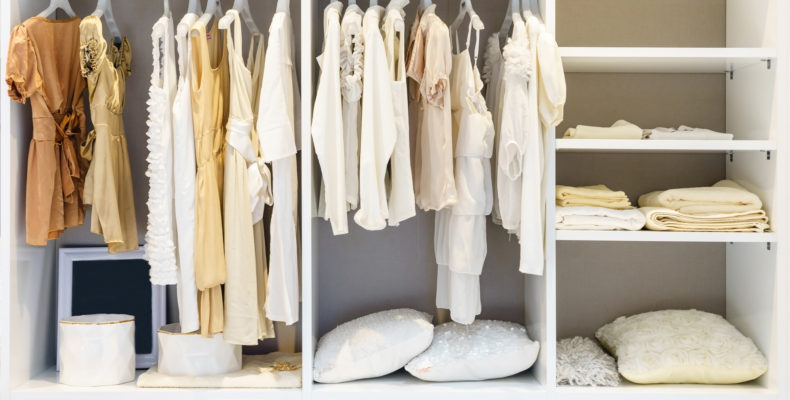
A walk-in closet works best when the layout begins with what needs to be stored and how the space will be used. Starting with an island, specialty accessory, or inspiration photo can make the room look finished while leaving everyday storage and circulation unresolved.
These seven planning steps can help homeowners organize priorities before cabinetry, lighting, and installation decisions are finalized.
1. Inventory what needs to fit
Begin with the current wardrobe rather than a generic list of closet features. Count the types of items that need short hanging, long hanging, folded storage, drawers, shoe storage, or occasional access. Include luggage, hampers, accessories, seasonal items, and anything that needs secure or concealed storage.
Note which items are used daily and which can be placed higher or farther from the entry. A homeowner who mainly stores shirts and folded clothing needs a different balance than someone with long garments, work uniforms, or a large shoe collection.
This is also a practical time to separate items that will not move into the new closet. The goal is not to discard belongings simply to make a design work. It is to avoid sizing new storage around items that are already intended for donation, relocation, or disposal.
2. Document the room and access conditions
Record the room’s existing conditions before planning cabinets or closet systems. Relevant details include wall lengths, ceiling height and slopes, door and window locations, trim, floor transitions, vents, outlets, switches, access panels, and any equipment that must remain reachable.
Consider how the closet connects to the bedroom, bathroom, or hallway. An entry door, pocket door, or sliding door can affect the available wall area and the way two people move through the space. Existing drawings are a useful starting point, but the responsible project team should verify field conditions before fabrication or installation.
3. Protect circulation before adding storage
Plan the walking route and the working space in front of storage before adding an island, bench, or deep cabinet. Test how hanging clothes, open drawers, cabinet doors, hampers, and people will occupy the room at the same time.
An island can add drawers and a useful surface, but it should be treated as an option rather than a default feature. If it restricts access or creates narrow pinch points, uninterrupted perimeter storage may be more useful.
Avoid relying on one universal clearance number. Comfortable space depends on door and drawer operation, clothing depth, the number of users, mobility needs, and applicable project requirements. Confirm critical dimensions with the designer, installer, contractor, and other responsible professionals.
4. Match storage types to the inventory
Assign storage according to item type and frequency of use. Double-hanging areas can make efficient use of vertical space for shorter garments, while long-hanging sections accommodate dresses, coats, and other full-length items. Shelves work well for folded clothing, bags, and bins; drawers can keep smaller items contained and reduce visual clutter.
Shoe shelves, hampers, jewelry storage, and luggage areas should be sized around real items rather than catalog assumptions. Place frequently used storage within comfortable reach and reserve higher locations for seasonal or occasional items.
Adjustable shelves and removable components can help the closet adapt as wardrobe needs change. They can also make a modest layout more useful than a highly specialized system that only fits the current inventory.
5. Coordinate lighting, power, and comfort
Use layered lighting to support navigation, clothing selection, and tasks at drawers or a dressing surface. General lighting may need help from integrated cabinet lighting or focused task lighting, especially where shelves and hanging clothes create shadows.
Fixture placement should be coordinated with doors, shelves, hanging rods, and stored materials. Review electrical requirements, fixture clearances, controls, and product instructions with the responsible contractor and manufacturer. If the room receives daylight, consider privacy, glare, heat, and fading as well as the benefit of natural light.
Ventilation and moisture conditions also affect comfort and stored materials, particularly when the closet connects directly to a bathroom. Include those conditions in the room assessment rather than treating the closet as an isolated cabinet project.
6. Add accessories after the essentials
Once storage and circulation are working, evaluate accessories such as a mirror, valet rod, bench, charging location, ironing storage, pull-out hamper, tie or belt organizer, and secure drawer. Choose features that support an actual routine instead of filling every available surface.
Confirm mounting, power, ventilation, and opening requirements before ordering accessories. A feature that conflicts with a drawer, door, outlet, or walking route can reduce the usefulness of the entire closet.
7. Plan materials, installation, and flexibility
Compare materials and finishes for durability, cleaning, edge quality, hardware performance, and compatibility with the adjoining room. Review shelf spans, expected loads, fasteners, wall conditions, trim, baseboards, flooring, and transitions with the installer or fabricator.
Installation sequencing matters when flooring, painting, electrical work, cabinetry, and doors are all changing. Establish who verifies dimensions, who supplies each component, and when final measurements occur. Leave room for reasonable future adjustments rather than making every section permanently specific to one wardrobe.
Turn the priorities into a closet plan
A useful closet plan can show storage zones, circulation, door and drawer operation, lighting locations, and the relationship to the adjoining room. Elevations help compare hanging, shelves, and drawers vertically, while a concept render can make material and layout decisions easier to discuss.
Early plans and renders do not replace field verification, product specifications, or installation details. They help homeowners and project teams identify conflicts and compare options before orders and construction decisions are locked in.
Planning a walk-in closet, dressing room, or built-in storage project?
3D Home Designs can help organize storage priorities into clearer plans, elevations, and concept renders before cabinetry and installation decisions are finalized.