
Shower walls affect more than the look of a bathroom. The enclosure can change privacy, borrowed light, cleaning routines, storage opportunities, door operation, and the way fixtures are reached.
Full glass, a pony wall with glass, and a full-height tile wall can all work well. The useful question is not which option is universally best, but which combination fits the room, household, and project conditions.
Three shower-wall configurations at a glance
These annotated views show how the amount of glass and solid wall can change the feeling of the room, natural light, privacy, usable wall area, and day-to-day upkeep. They compare spatial effects—not construction assemblies.
We first ask how you want the shower to feel: open and bright, or more private and grotto-like. From there, we look at cleaning preferences and the practical details that shape daily use—curb or curbless entry, bench location, towel placement, nearby cabinets, window location, and whether the controls are easy to reach.
Full-glass enclosure
A strong fit when open sightlines and shared natural light are priorities.

- Natural light and the arrival viewWhen a shower is close to the bathroom entry, glass can keep the first view open and help window light travel farther.
- Door, entry, and cabinet clearancesCoordinate the door swing, curb or curbless entry, hardware, and nearby cabinetry before finalizing the layout.
- More of the shower stays visibleOpen sightlines also put the tile, fixtures, and everyday water spotting more in view.
- Fewer solid mounting surfacesGlass-mounted towel bars are possible, but they can cost more than accessories mounted to a solid wall.
- Borrowed light
- Most
- Visual screening
- Least
- Solid wall area
- Least
- Exposed glass
- Most
Pony wall with glass above
A practical balance between openness above and useful wall area below.

- Useful solid wall areaThe lower wall adds screening and can provide a practical location for a towel bar or other accessories.
- Light above the wallGlass shares more natural light and visual connection than a full-height opaque wall.
- Coordinate the wall cap earlyPony-wall height, glass support, tile edges, and bench placement can all affect one another.
- Plan the entry around daily useCheck the door swing, curb or curbless entry, and whether the controls can be reached without stepping into the spray.
- Borrowed light
- Moderate
- Visual screening
- Moderate
- Solid wall area
- Some
- Exposed glass
- Moderate
Full-height tile wall
A stronger fit when privacy or a more sheltered, grotto-like feeling is the priority.

- Privacy and atmosphereA solid wall creates stronger visual separation and can make the shower feel more sheltered.
- Light, color, and ventilation matter moreWith less borrowed light, lighting and finish colors have a bigger effect on whether the space feels cozy or closed in.
- Keep the entry convenientWhen possible, controls near the opening can let you start the water without standing beneath the spray.
- Use interior walls strategicallyDepending on the adjoining room and wall construction, an interior plumbing wall may offer more practical future access from the opposite side.
- Borrowed light
- Least
- Visual screening
- Most
- Solid wall area
- Most
- Exposed glass
- Least
Swipe or scroll horizontally to view the complete comparison table.
| Planning lens | Full glass | Pony wall + glass | Full-height tile wall |
|---|---|---|---|
| Light and sightlines | Most open | Partially open | Most enclosed |
| Visual screening | Least | Partial | Most |
| Solid wall area | Least | Some below glass | Most |
| Exposed glass to maintain | Most | Moderate | Least |
Conceptual comparison only. Final glass support, waterproofing, drainage, framing, accessibility, product requirements, and installation details must be coordinated for the selected system.
1. Start with the room and project conditions
Document the shower's size and shape before selecting an enclosure. Note the entry location, curb or curbless transition, ceiling conditions, windows, exterior walls, plumbing locations, and the paths of nearby doors, drawers, and bathroom traffic.
List the features that need coordinated space: controls, showerheads, handheld fixtures, niches, benches, shelves, grab bars, and towel access. Think about who will use the shower, how much privacy they prefer, and whether someone may need easier entry or assistance.
These conditions can narrow the options quickly. A wall may provide useful support and storage space, while additional glass may share light and preserve a longer view through the room. Field conditions, product requirements, applicable codes, and accessibility needs should be verified by the responsible project professionals.
2. Evaluate a full-glass enclosure
A full-glass enclosure can keep sightlines open and make tile work visible from the rest of the bathroom. It may be useful when the shower would otherwise interrupt natural or artificial light, or when an open visual connection is an important design goal.
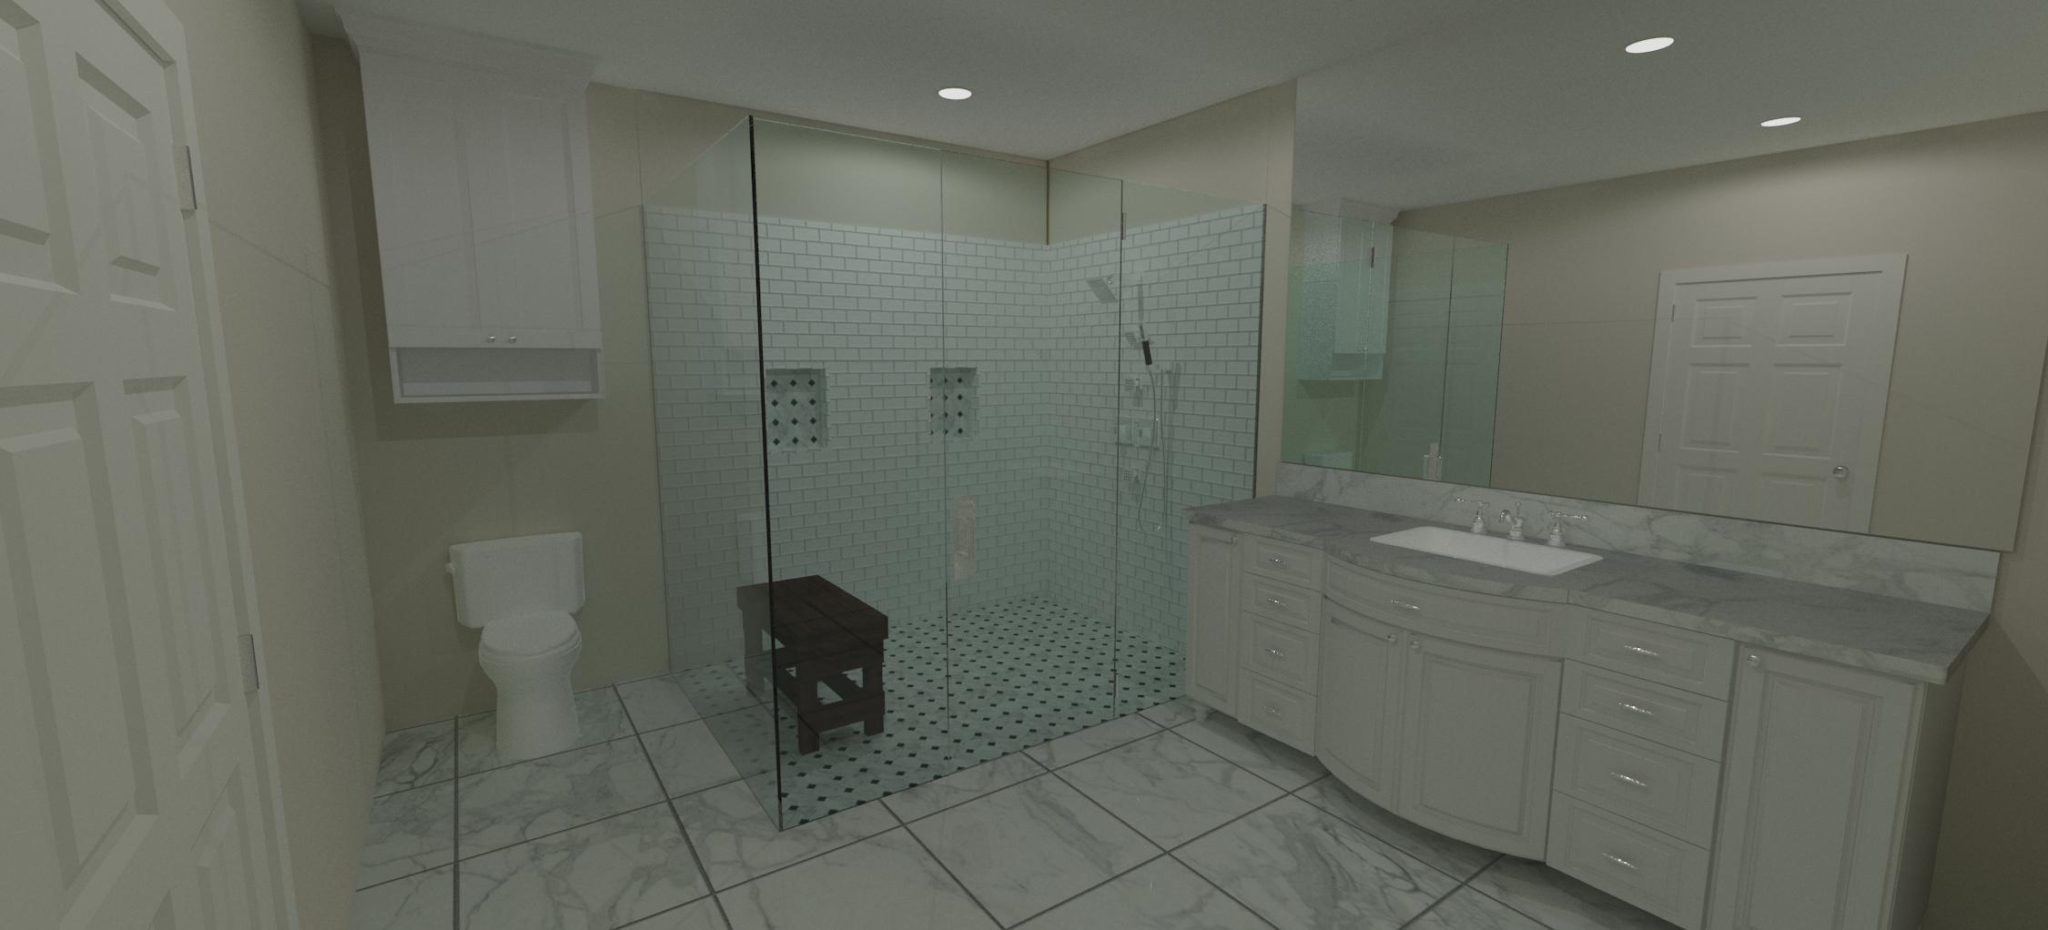
More glass also means more exposed surface to maintain and less solid wall area for controls, storage, or privacy. Door swings, handles, hinges, clips, and support conditions need to be coordinated with the tile layout and framing. Custom panels generally require final measurements after the supporting surfaces are complete enough for the fabricator's process.
Check how a user reaches the valve before entering, whether the door can operate without conflicts, and where towels will be available after the shower. The glass supplier, contractor, and designer can confirm suitable panel sizes, support, hardware, and installation sequencing for the selected system.
3. Consider a pony wall with glass
A pony wall combines a solid lower section with glass above it. This approach can provide partial privacy and a place to coordinate a bench, niche, control, or other feature while still allowing light and views across the upper part of the room.
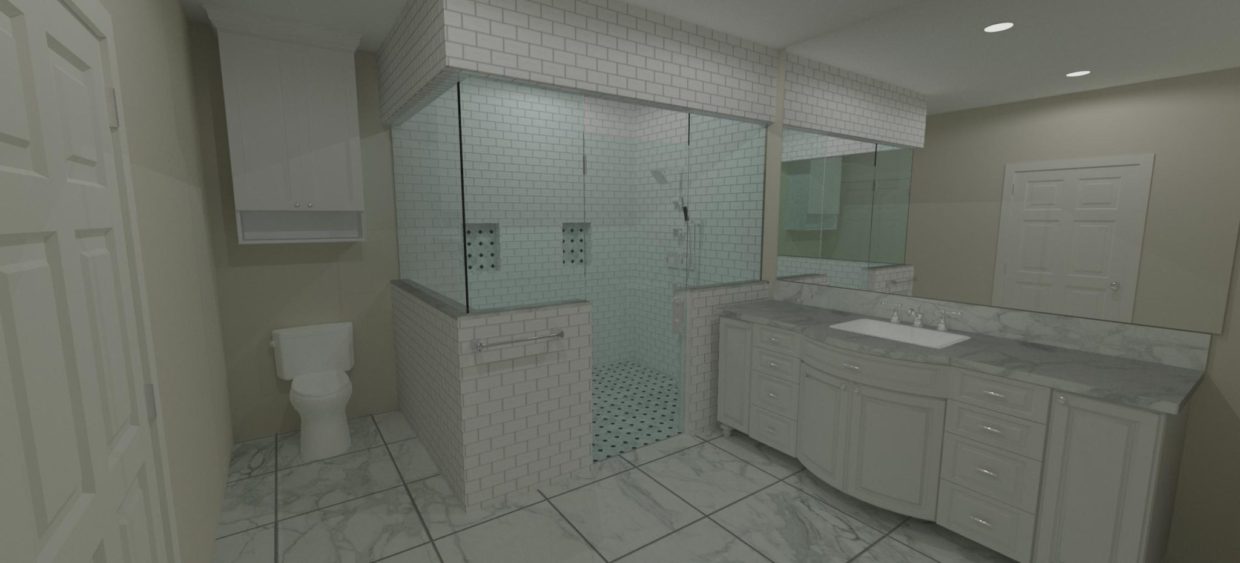
The top and ends of the wall need a deliberate finish. Tile edge profiles, stone or solid-surface caps, grout joints, glass alignment, and adjacent finishes should be resolved together rather than left as separate field decisions. The waterproofing and glass interfaces also need to follow the selected systems and manufacturer instructions.
A pony wall adds visual mass compared with an all-glass enclosure, and its height can affect both privacy and the proportion of the glass above it. Study the main bathroom sightlines and the view from inside the shower before finalizing the wall height.
4. Review a full-height tile wall
A full-height tile wall can create the strongest visual separation and privacy of these options. It also provides continuous wall area that may simplify the placement of some fixtures, niches, benches, or grab-bar backing when those details are planned early.

The tradeoff is reduced borrowed light and a more enclosed view. That effect may be welcome in a private shower or disruptive in a compact room, depending on the wall location, lighting plan, finishes, and ceiling height.
A tiled wall does not remove maintenance. Tile, grout, sealants, corners, and penetrations all need appropriate materials and care. Review the finish schedule, edge conditions, lighting, and ventilation as part of the enclosure decision.
5. Compare maintenance and privacy
Maintenance depends on the actual materials, water conditions, ventilation, household habits, and cleaning products. Glass can show water spots, soap residue, and fingerprints. Tile and grout introduce joints and corners that may need different care. Protective glass treatments or lower-maintenance finish selections can help in some projects, but product claims and care instructions should be reviewed before purchase.
Privacy is also specific to the room. Consider views from the bathroom entry, toilet, vanity, bedroom, and windows as well as views from inside the shower. Clear, patterned, tinted, or partially obscured glass can change those relationships without replacing the entire enclosure concept.
Choose the balance the household is realistically willing to clean and comfortable using. A visually open option is not an improvement if it creates an unwanted daily routine or exposes sightlines the users would prefer to screen.
6. Coordinate water, ventilation, and access
The wall choice needs to work with the complete shower assembly. Coordinate the waterproofing approach, drainage, slopes, curb or threshold, door seals, glass channels, fasteners, niches, benches, and fixture penetrations before installation begins. The responsible contractor and manufacturers should resolve how the selected components connect.
Ventilation and drying conditions matter in every enclosure. Review exhaust placement and capacity, air movement, operable doors or transoms where applicable, and any project-specific requirements with the responsible professionals.
Test the entry and controls as a sequence. A user should be able to approach the shower, operate the door, reach controls as intended, enter, and retrieve a towel without avoidable conflicts. Mobility needs, grab-bar locations, thresholds, seating, and caregiver access may change the preferred layout and should be included early.
7. Turn the choice into a coordinated plan
Once the enclosure direction is selected, document it in plan and elevation views. Show wall heights, glass extents, door operation, hardware, controls, niches, benches, tile transitions, and nearby cabinets or fixtures. Aligning these details can reveal conflicts before framing, waterproofing, tile, or glass orders are finalized.
A concept render can help compare how much light and visual separation each option creates. Dimensioned plans and elevations can then communicate the chosen direction to the contractor, tile installer, glass fabricator, plumber, electrician, and other project participants.
Design drawings and renders support decisions, but they do not replace field verification, engineering when required, product specifications, permits, or installation documents from the responsible professionals.
Comparing shower walls or planning a bathroom remodel?
3D Home Designs can help organize enclosure, fixture, storage, finish, and circulation decisions into clearer plans, elevations, and concept renders before construction choices are locked in.